-
Sign in
The following tutorial will teach you how to quickly create a hosted web app and deploy it to a Raspberry Pi 2 using Visual Studio (VS). This is now possible thanks to the Windows Internet of Things (IoT) core and project Westminister. By the end of this tutorial, you will have succesfully converted your website into a Universal Windows Platform (UWP) application that can run on the Raspberry Pi and even communicate with sensors!

Choose an existing website that will work great as a single-page app. We highly recommend that you are the owner or developer of the site; this way you will be able to make all the necessary changes.
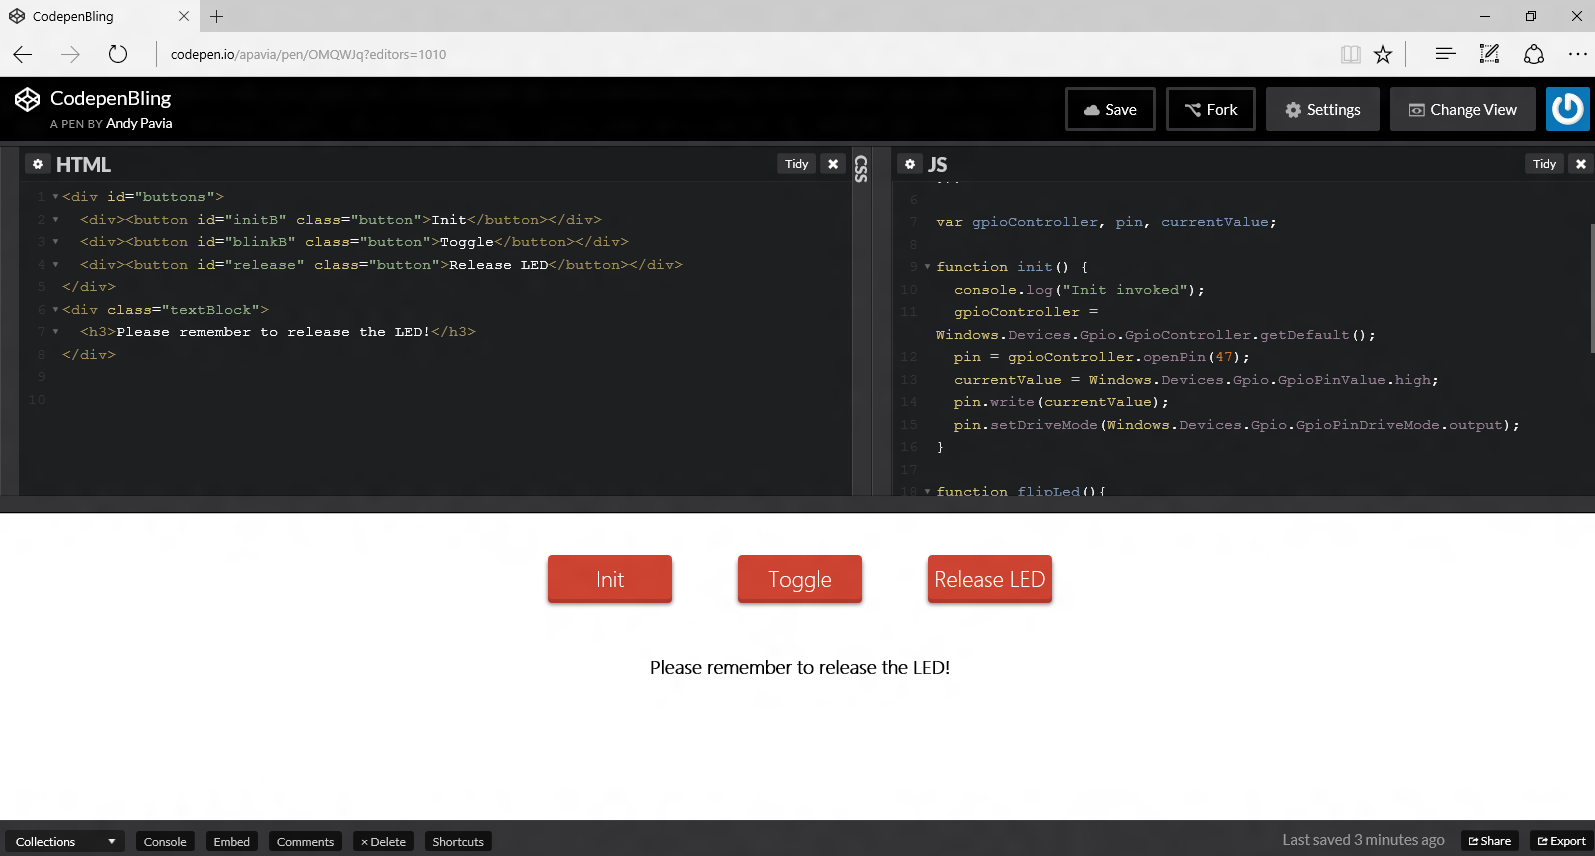
If you do not have a URL in mind, we will be walking you through using this Codepen example as the website. The codepen allows you to control the Pi's on-board LED.
Copy your URL, or the Codepen URL, to use throughout the tutorial.
Launch Visual Studio 2015.
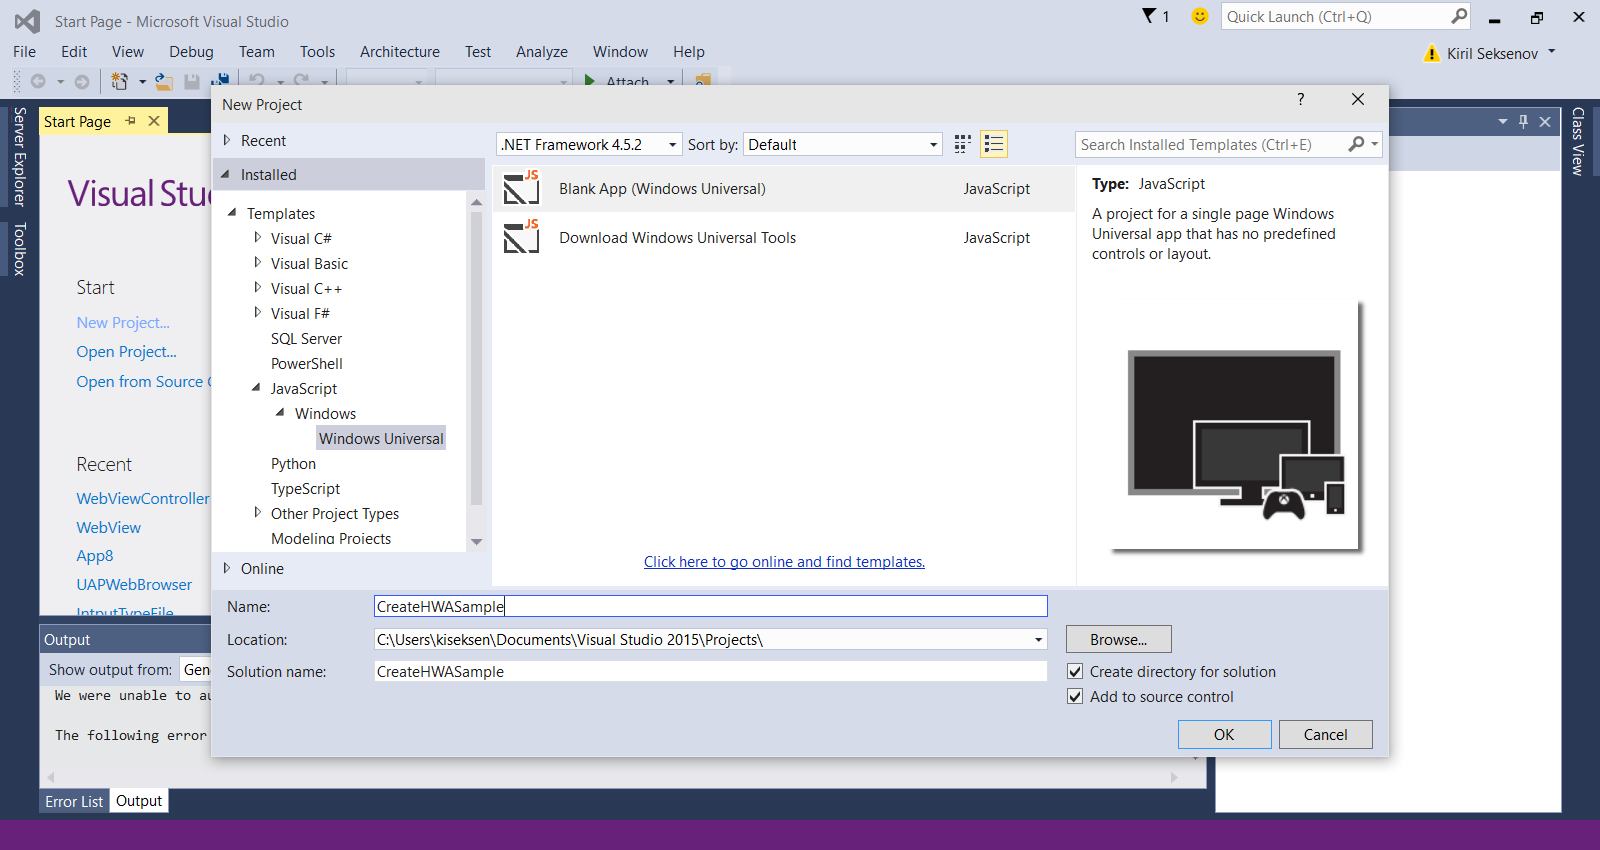
Since this is a hosted web app, where the content is served from a remote server, you will not need most of the local app files that come with the JavaScript template by default.
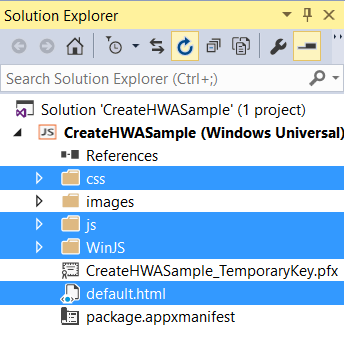
Delete any local HTML, JavaScript, or CSS resources. All that should remain is the package.appxmanifest file, where you configure the app, and the image resources.
package.appxmanifest file.default.html with your website URL.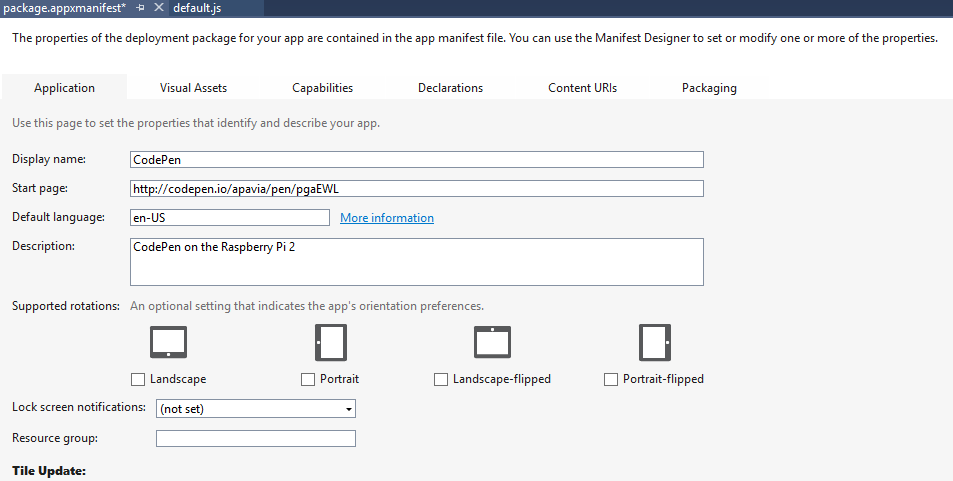
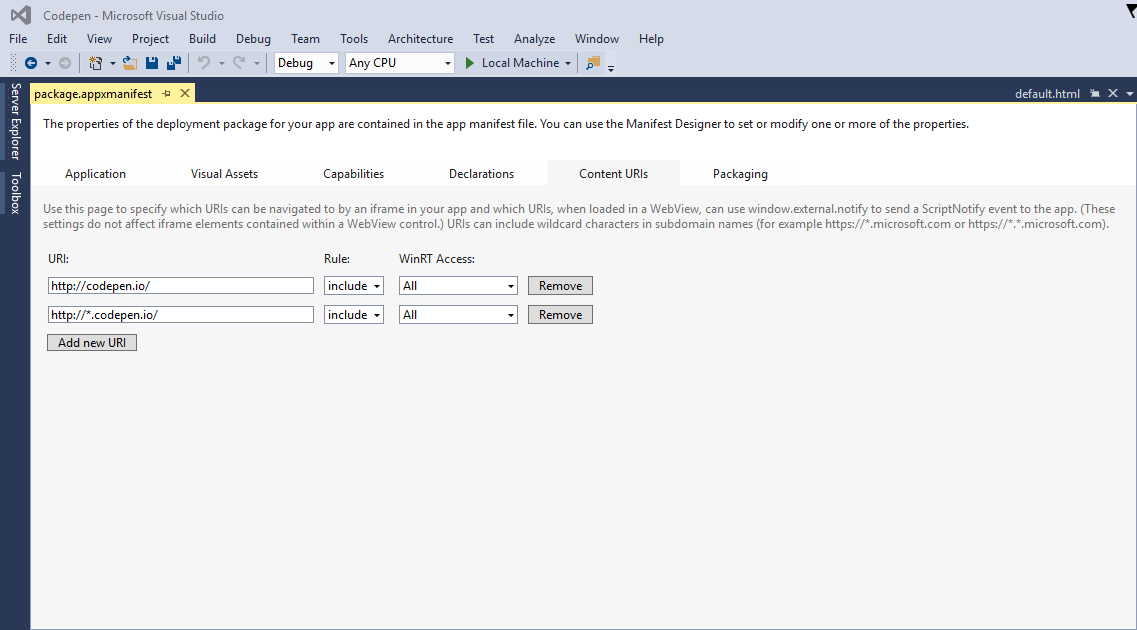
Application Content URI Rules (ACURs) specify which remote URLs are allowed access to your app and to the Universal Windows APIs. At the very minimum, you will need to add an ACUR for your start page and any web resources utilized by that page. For more information on ACURs, click here.
package.appxmanifest file.Add any necessary URIs for your start page.
For example:
1. http://codepen.io/
2. http://*.codepen.io/
At this point, you have a fully functioning Windows 10 app capable of accessing the Universal Windows APIs!
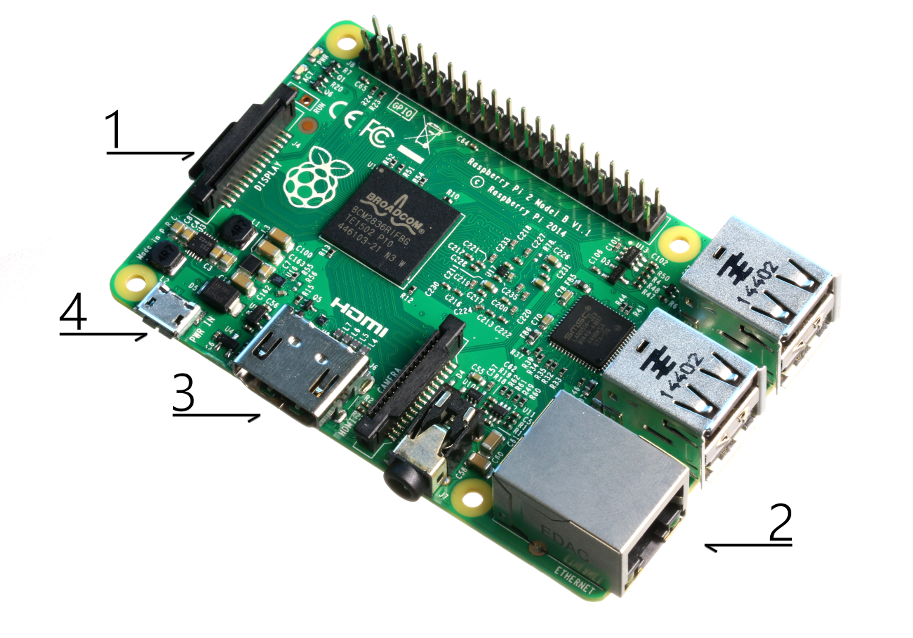
Windows 10 IoT Core will boot automatically after connecting the power supply. This process will take a few minutes. After seeing the Windows logo, your screen may go black for about a minute - don't worry, this is normal for boot up.
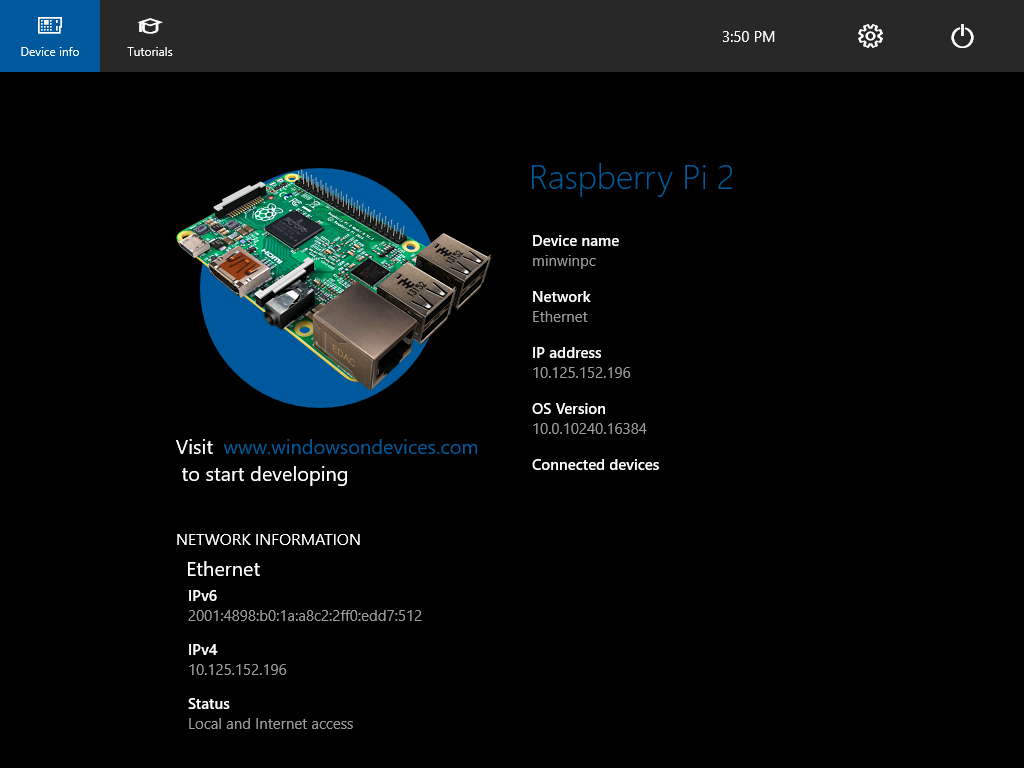
Once the device has booted, the DefaultApp will launch. Click on device information on the top left. This will display the IP address of your RPi2. Take note of the IP address you will need it later.
At this point, Visual Studio will present the Remote Connections dialog. If you previously used Powershell to set a unique name for your device, you can enter it here (in this example, we're using my-device). Otherwise, use the IP address of your Windows IoT Core device. After entering the device name/IP select Universal (Unencrypted Protocol) Authentication Mode, then click Select.
You can verify or modify these values by navigating to the project properties (select Properties in the Solution Explorer) and choosing the Debug tab on the left.

 Edit this page on GitHub